Fractal Art Week
Hello and welcome to this guide!
But...what's a reptile even?

The name was coined as a pun (in relation to actual reptiles, like snakes or crocodiles), although in this case it's the short form for repetition tile.
In the geometry of tessellations, a rep-tile or reptile is a shape that can be dissected into smaller copies of the same shape.Wikipedia, the Free Encyclopedia
Basically, many tiles of the same shape and size combine to form a bigger tile with the same shape.
Here you can see a selection of the most common reptiles:

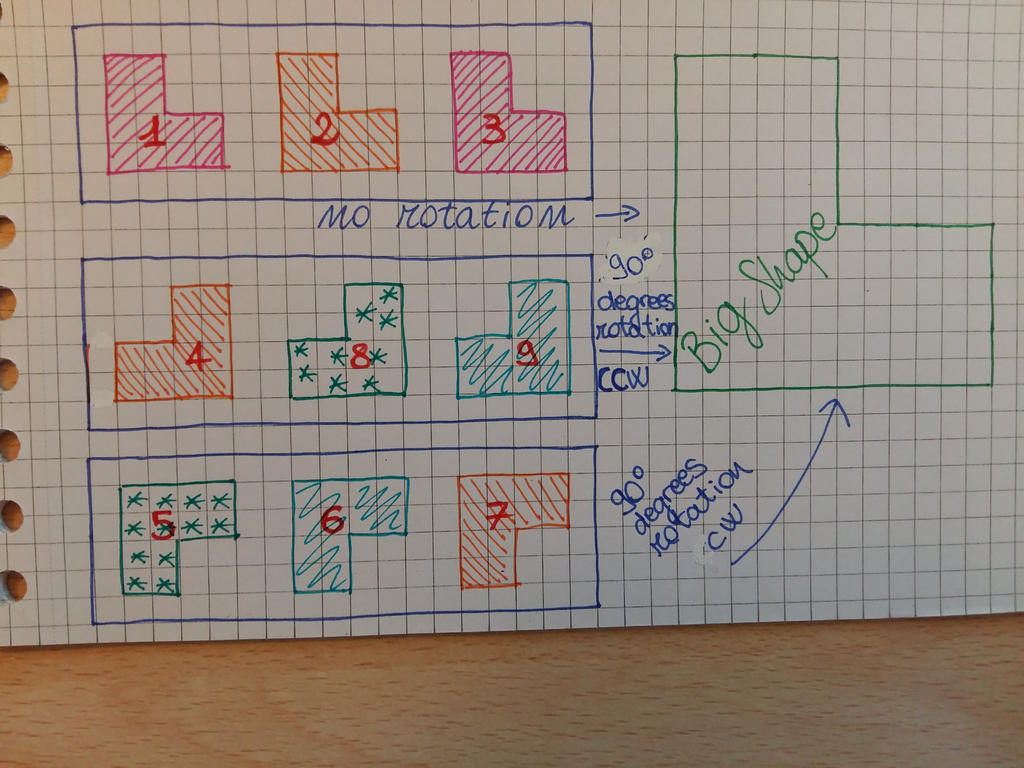
As example, I'm going to make this tile, since it doesn't require very mathy operations:
Let's get started!
First of all, what does C-91 usually need to make a reptile? (everybody has their own method, which might differ from mine!)
- Apophysis 7x (any version)
- Chaotica (to render and to adjust colors)
- Color pens or pencils
- A piece of paper, preferrably grid paper
- A calculator (the computer one is more than enough)
Step 1: Paper work
That's where I begin! It's easier for me to design the position of the Apophysis transforms on a piece of paper and then convert it into the program itself. The grid paper is so useful for this purpose. First of all, I'm going to reproduce the guide triangle of the Apophysis editor on my sheet:
As you can see, it's normal to assume that the length of both triangle sides is 1. What we need to do now is to fit the big tile we want to reproduce in this guide triangle. It's easy to see that the step of the "L" shape is half of the longest side of the tile, so its length will be 0.5:
Now the "fun" part: I'll fill the big "L" shape with all the mini "L" tiles. The total number of tiles, which I counted from the model I showed you before, is 9, so I'm going to fit 9 mini "L"s into the big "L":
As you can see, one side of the big "L" contains 3 sides of the small "L" tiles. This means that if the side of the big L is 1 and can contain 3 tiny "L"s, the side of one tiny "L" will be (you can use the calculator to do it, 6 digits precision will do):
1 ÷ 3 = 0.333333
Write this value down, as it will be very useful later on.
How do we translate all of this into Apophysis "language"? You need to consider that in Apophysis, to every tile must correspond ONE transform. So, if this big "L" is made of 9 mini "L" tiles, this means that our fractal in Apophysis will be made of 9 transforms. But how should I position them to make sure that I'll have my shape, since some are rotated? Let's see! I'll draw a scheme to make it clearer:
Summing up:
- Tiles 1, 2 and 3 are not rotated in comparison to the original shape. Therefore, their corresponding transforms won't be rotated either;
- Tiles 4, 8 and 9 are rotated by 90° counterclockwise in comparison to the original shape, so their corresponding transforms will be rotated as well with the same criteria;
- Tiles 5, 6 and 7 are rotated by 90° clockwise in comparison to the original shape. Therefore, their corresponding transform will be rotated with the same criteria.
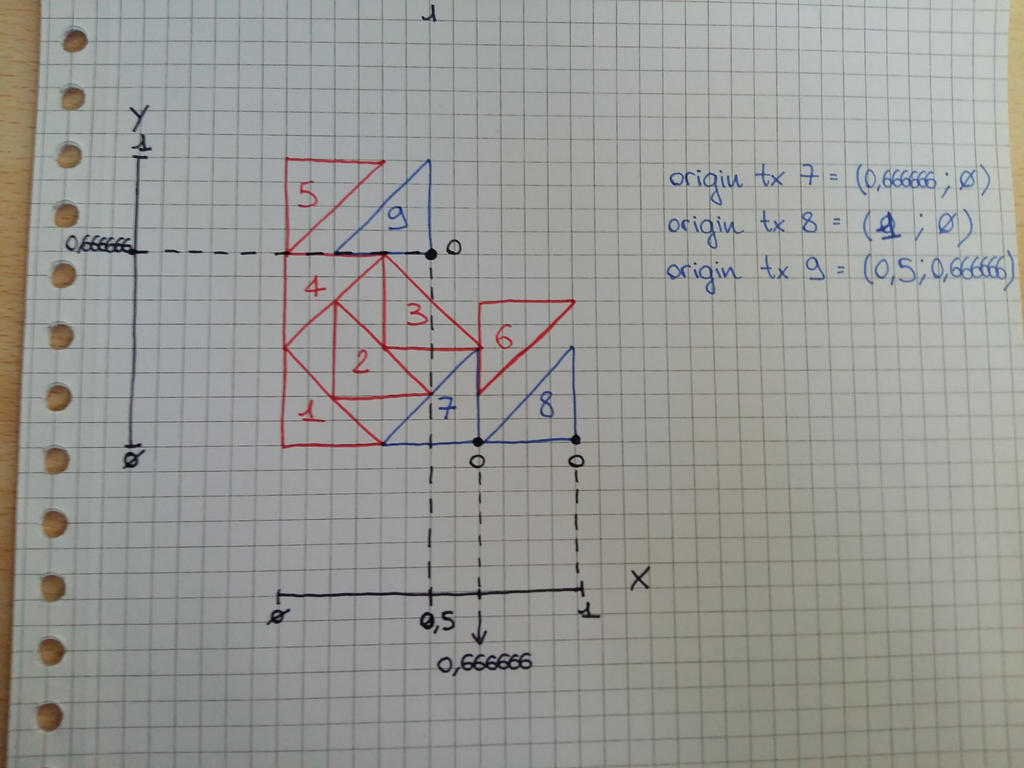
I'm going to draw the transforms directly on the tiles I have on my paper, so that I'll have a ready scheme for my editor (I make a new picture so that it's less crowded):
HINTS AND GENERAL RULES: Choose the tile which is not rotated if compared to the bigger shape and set its transform accordingly, paying attention when choosing the corner of the tile as transform origin. Also, assign the transform side length to the longest side of the tile (when the sides have different lengths - examples below). It will be easier to build the whole fractal from there, as it saves a lot of math operations. 
Step 2: Conversion in Apophysis
Open your Apo version of choice and start with a blank flame. You'll have a transform with linear=1. Now we have to make it so that the triangle side length equals the length of the side of the tile. In this case, we saw that the side of the tile is 0.333333, so open the Transform tab and set:
It's easier to insert directly the values in the Transform tab instead of shrinking the transform in the triangle tab. Now let's duplicate this transform twice so that we'll have the three tiles which are not rotated, and the position them in the plane. Which value? Let's see:
So, in the editor, it will look like this (just insert the value 0.166666 in the Triangle tab and move the transforms accordingly):
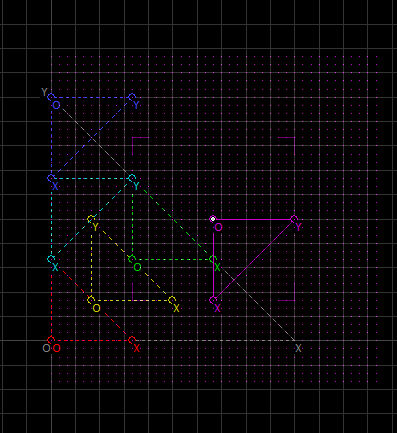
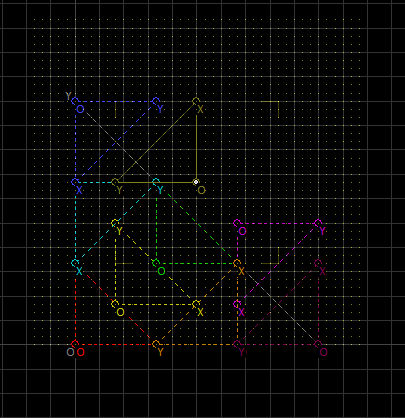
Now it's time to place the rotated transforms. Let's duplicate transform 1, rotate the copy by 90° clockwise and duplicate this copy twice. How should we move them on the plane? Let's see the scheme and then the result in the editor:
Let's move on with the transforms which are rotated 90° counterclockwise. Duplicate transform 1 and rotate its copy by 90° CCW, then duplicate this copy twice. Let's see how they should look like on the plane and in the editor:
If you did everything correctly, you should have our original big "L" in your preview!
(Hint: your tile is correct when no gaps and/or overlaps are visible in its preview)
What I usually do is to zoom in as much as possible until I don't have any empty space anymore:
I know it's not very interesting like this, but we're going to change it with the next step!
Step 3: Chaotica
I like to render my tiles with Chaotica: among the many reasons, it has a function (Shaders) which helps when it comes to coloring a fractal, and since in tiles the coloring can make the difference, I'm going to show you how I usually do. First of all, I copy my parameters from Apophysis (Edit > Copy), open Chaotica and paste them (Edit > Paste XML from clipboard). That's what I get:
The Shaders function button is to be found on the lower left corner of the preview window. When clicked, it opens a new window where you can choose the coloring your prefer. If none of the shaders matches your taste, you can just press the Shaders button again and the program will load new combinations:
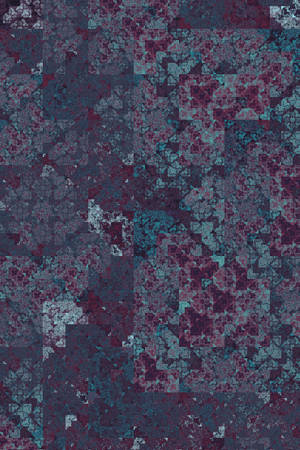
After changing the gradient to a softer option, I'll save some example of the same tile, but with different shaders option, to show you how different the outcome can be (click to enlarge!):
That's it! Of course I don't usually make all these schemes because it would take me ages to make a tile everytime.
Tiles can be much fun! Don't be scared and have a go! See you next time and check Linear Tile Tutorial for a more technical explanation.


